Architecture
Who this page is for
Developers, contributors, and curious people who want to understand how HomelabARR works under the hood. If you just want to use HomelabARR, you can skip this entirely — the Quick Start and Web Dashboard guides have everything you need.
If you're adding custom app templates, CLI Bridge is the relevant page. If you want to contribute code, start with Contributing.
Security envelope
HomelabARR ships with authentication, rate limiting, CSRF protection, audit logging, container hardening, and a full set of security headers by default. See Security for the complete list of controls.
The Big Picture
HomelabARR is two containers working together:
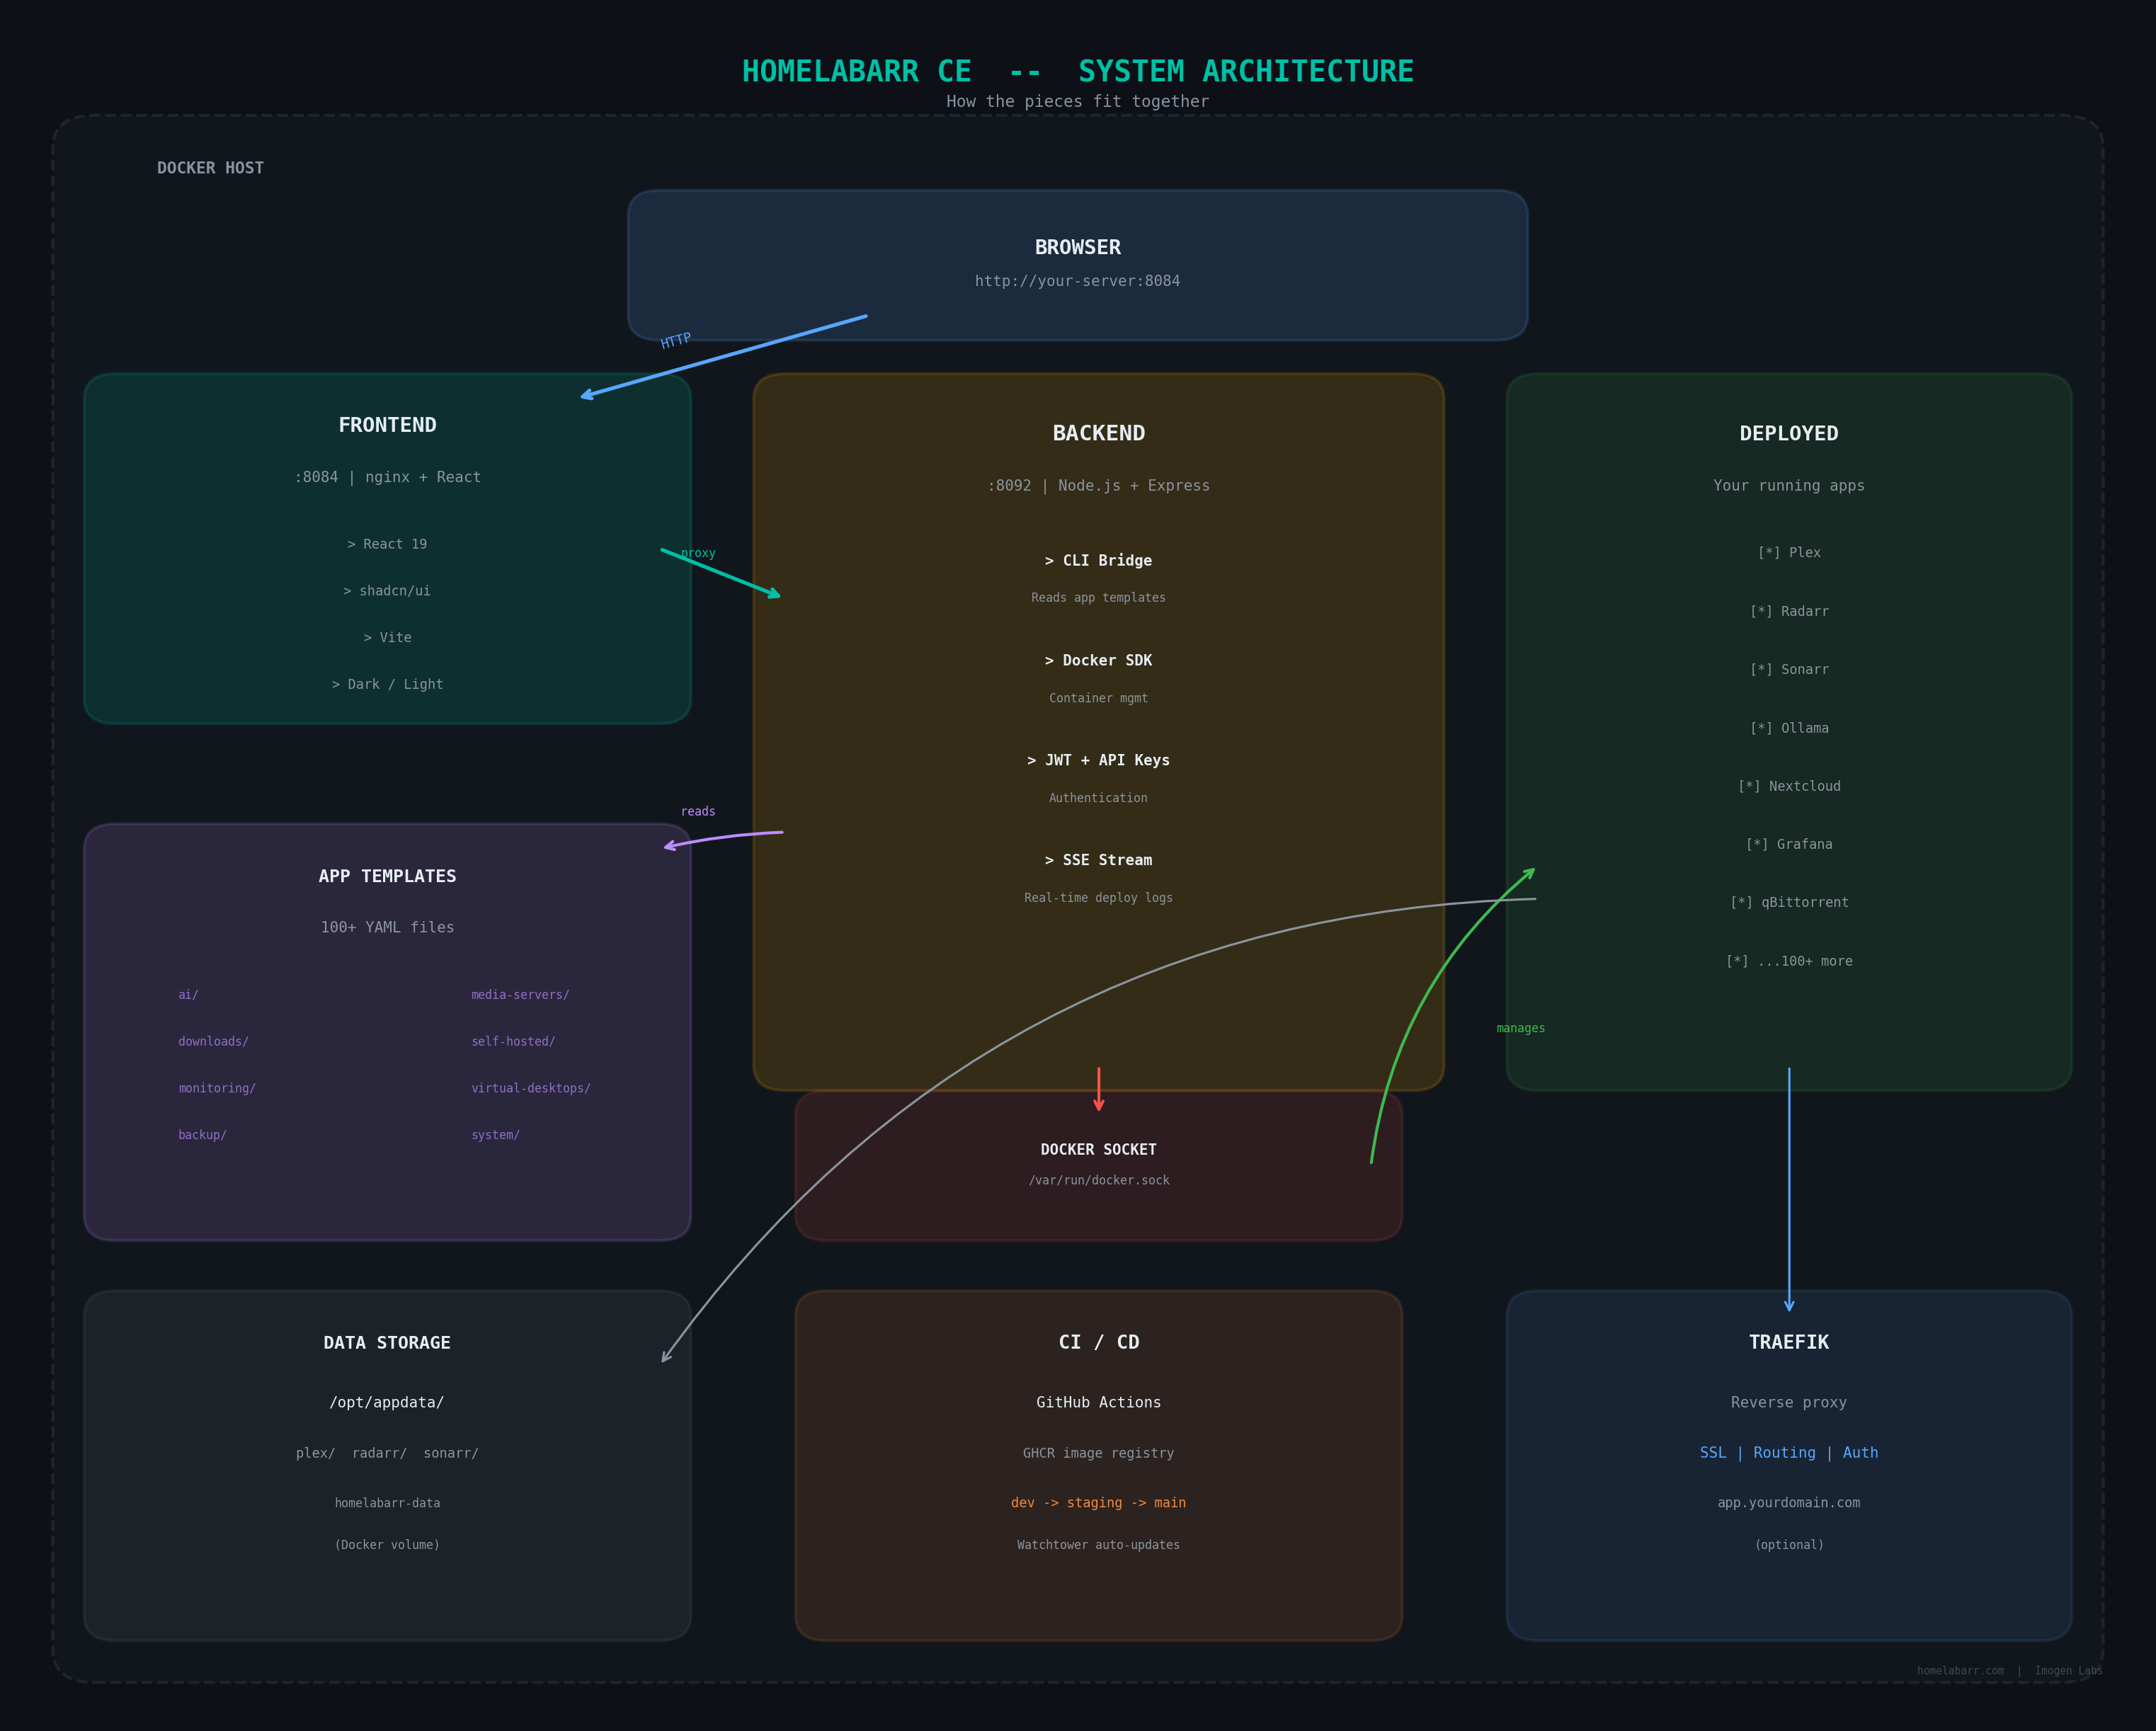
- Frontend (port 8084) — a React app served by nginx. This is what you see in your browser. It proxies all API calls to the backend via nginx.
- Backend (port 8092) — a Node.js/Express server. It reads app templates, talks to Docker, handles authentication (JWT + API keys), and streams deployment output to your browser in real time via SSE.
- App templates — standard Docker Compose YAML files in the
apps/folder. The backend reads them; you deploy them with one click. See CLI Bridge for how they work.
How Deployment Works
sequenceDiagram
    autonumber
    participant B as 🌐 Browser
    participant F as 🎨 Frontend<br/>(nginx · :8084)
    participant A as ⚙️ Backend<br/>(Node.js · :8092)
    participant C as 📄 CLI Bridge<br/>(apps/ templates)
    participant D as 🐳 Docker<br/>(socket)
    participant R as 📦 Running<br/>Container

    B->>F: Click Deploy<br/>(app: plex, mode: traefik)
    F->>A: POST /api/deploy<br/>{ app, mode, env }

    A->>C: Load YAML template<br/>apps/media-servers/plex.yml
    C-->>A: Raw template

    Note over A: Transform for mode:<br/>• Standard → strip Traefik labels<br/>• Traefik → add proxy network + labels<br/>• Authelia → add chain-authelia middleware

    A->>A: Fill variables<br/>(TZ, PUID, data paths...)

    A->>D: docker compose up -d
    D->>D: Pull image if needed
    D-->>A: Stream output lines

    A-->>F: SSE stream<br/>(real-time progress)
    F-->>B: Live log output<br/>in deploy modal

    D->>R: Container starts
    R-->>D: Healthy ✓
    D-->>A: Exit 0
    A-->>F: SSE: { status: "success" }
    F-->>B: ✅ Deployed!
How to read this diagram
Each column is a component. Arrows show messages passing between them, top to bottom = time moving forward. The numbered steps match the list below.
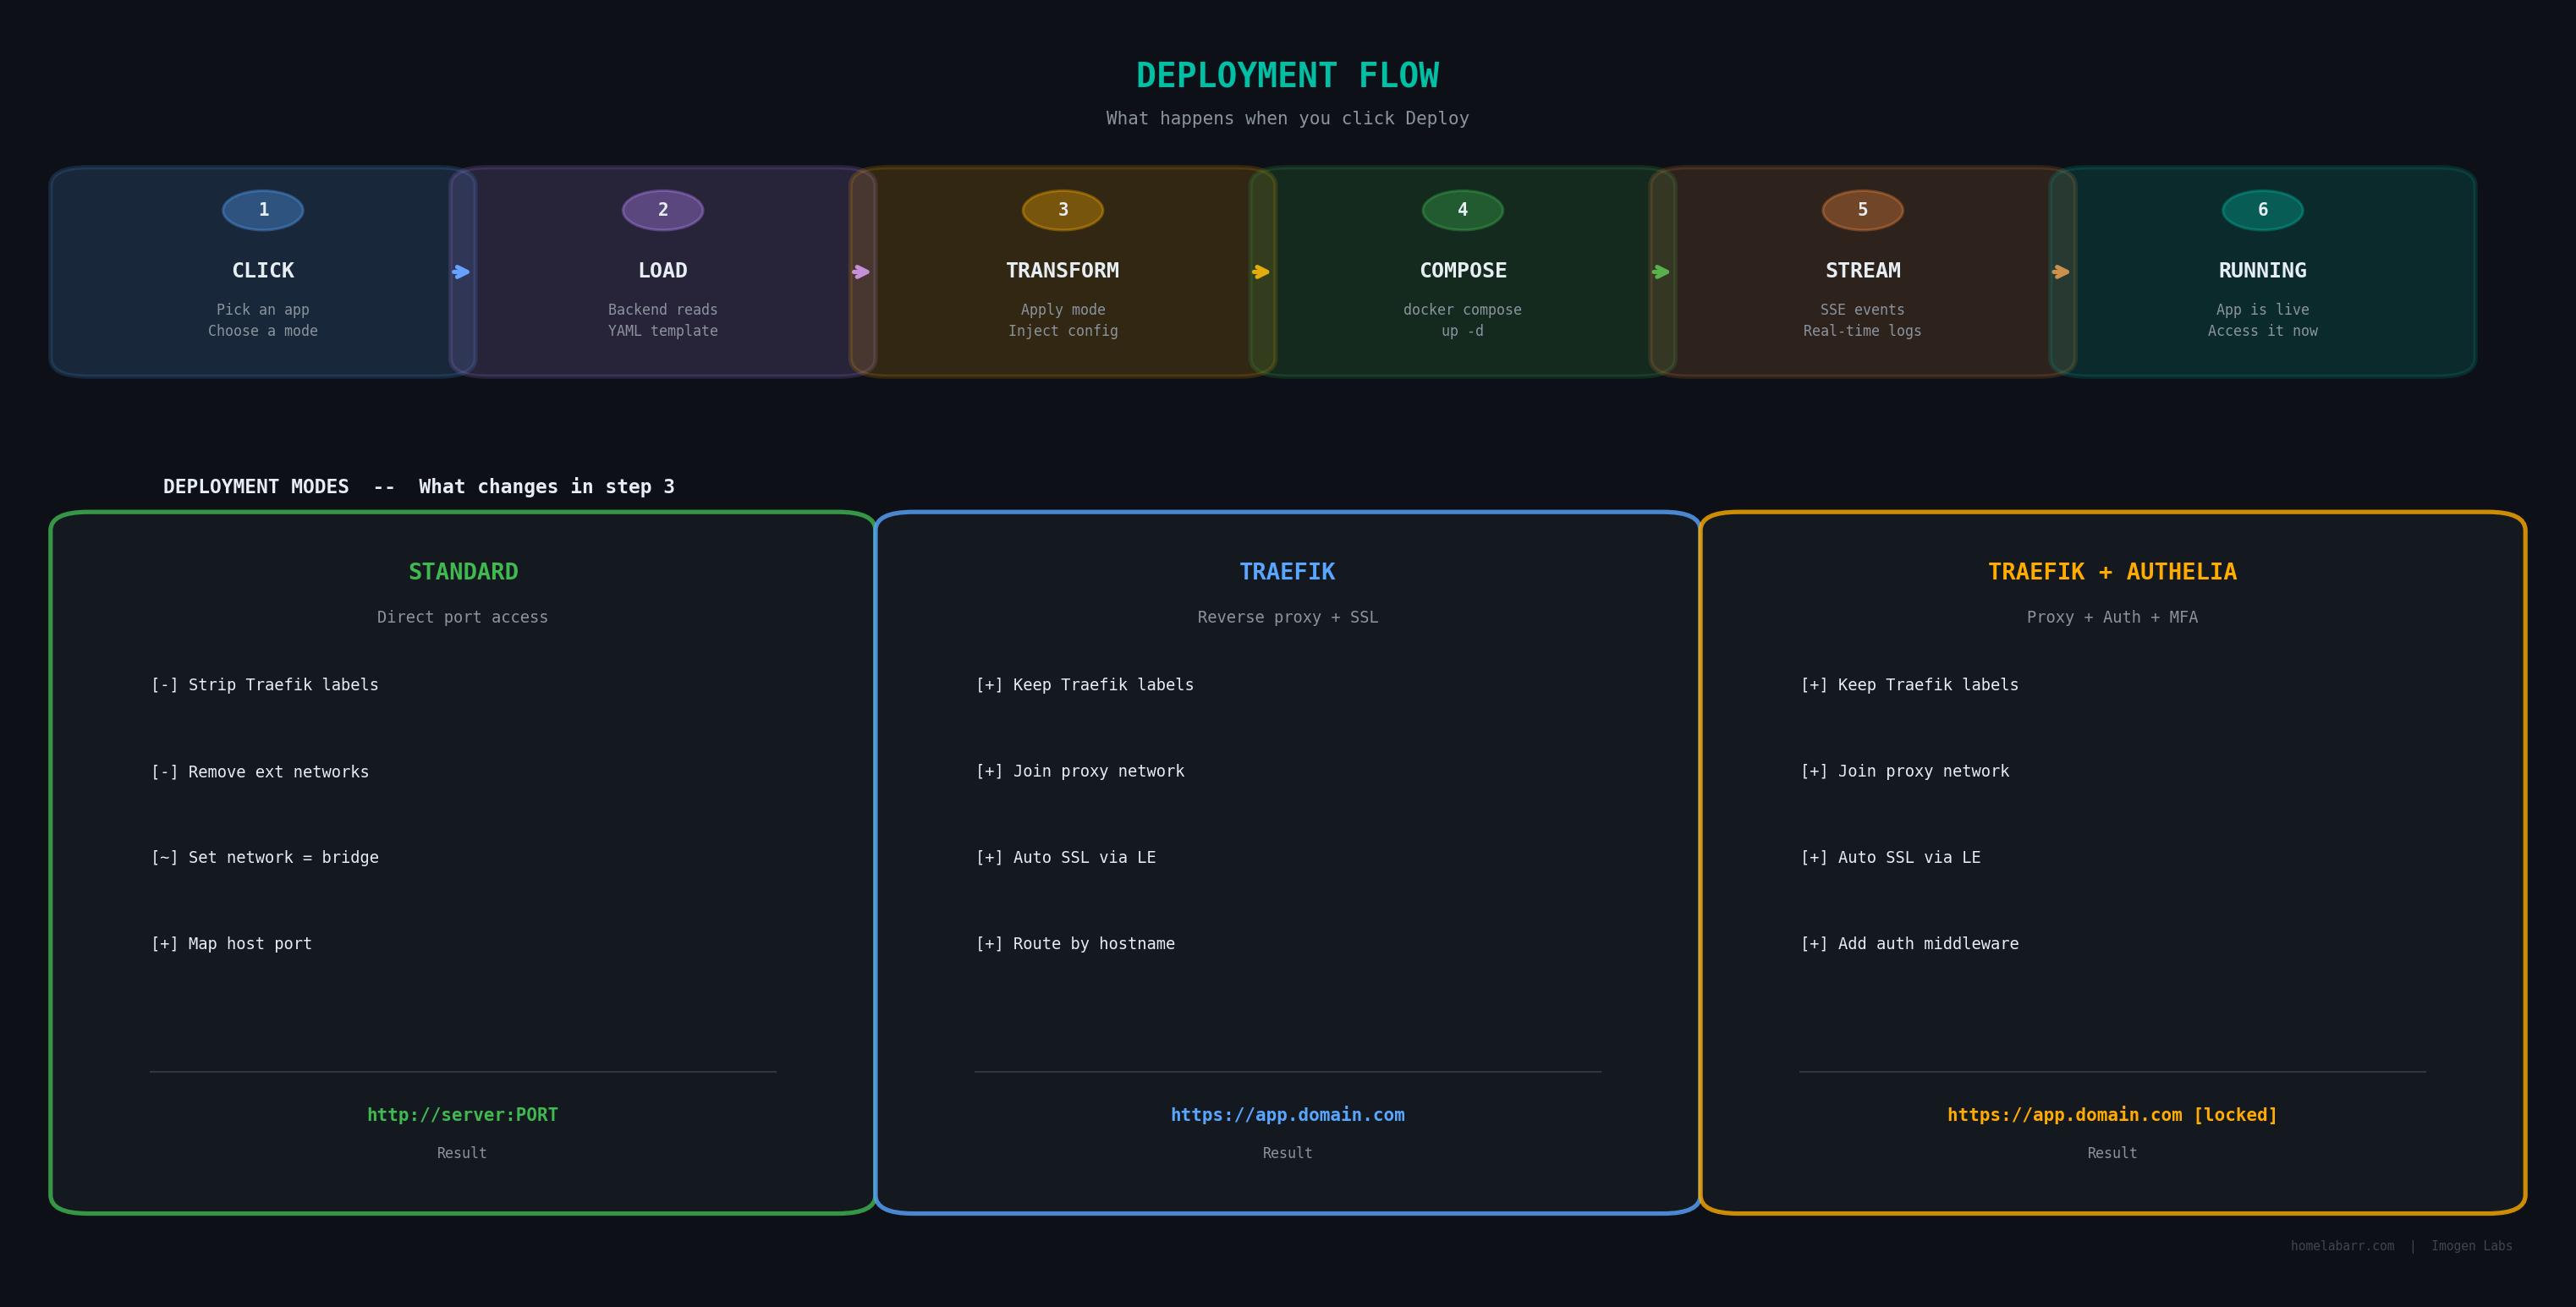
When you click Deploy:
- You pick an app and a mode (Standard, Traefik, or Traefik + Authelia)
- Frontend sends a request to the backend: "deploy Plex in standard mode"
- Backend loads the Plex YAML template from
apps/media-servers/plex.yml - Backend transforms the template for the chosen mode (see CLI Bridge for details)
- Fills in your settings (timezone, data path, user ID, etc.)
- Runs
docker compose up -d - Streams Docker output back to your browser in real time
- Container is running
Network Modes
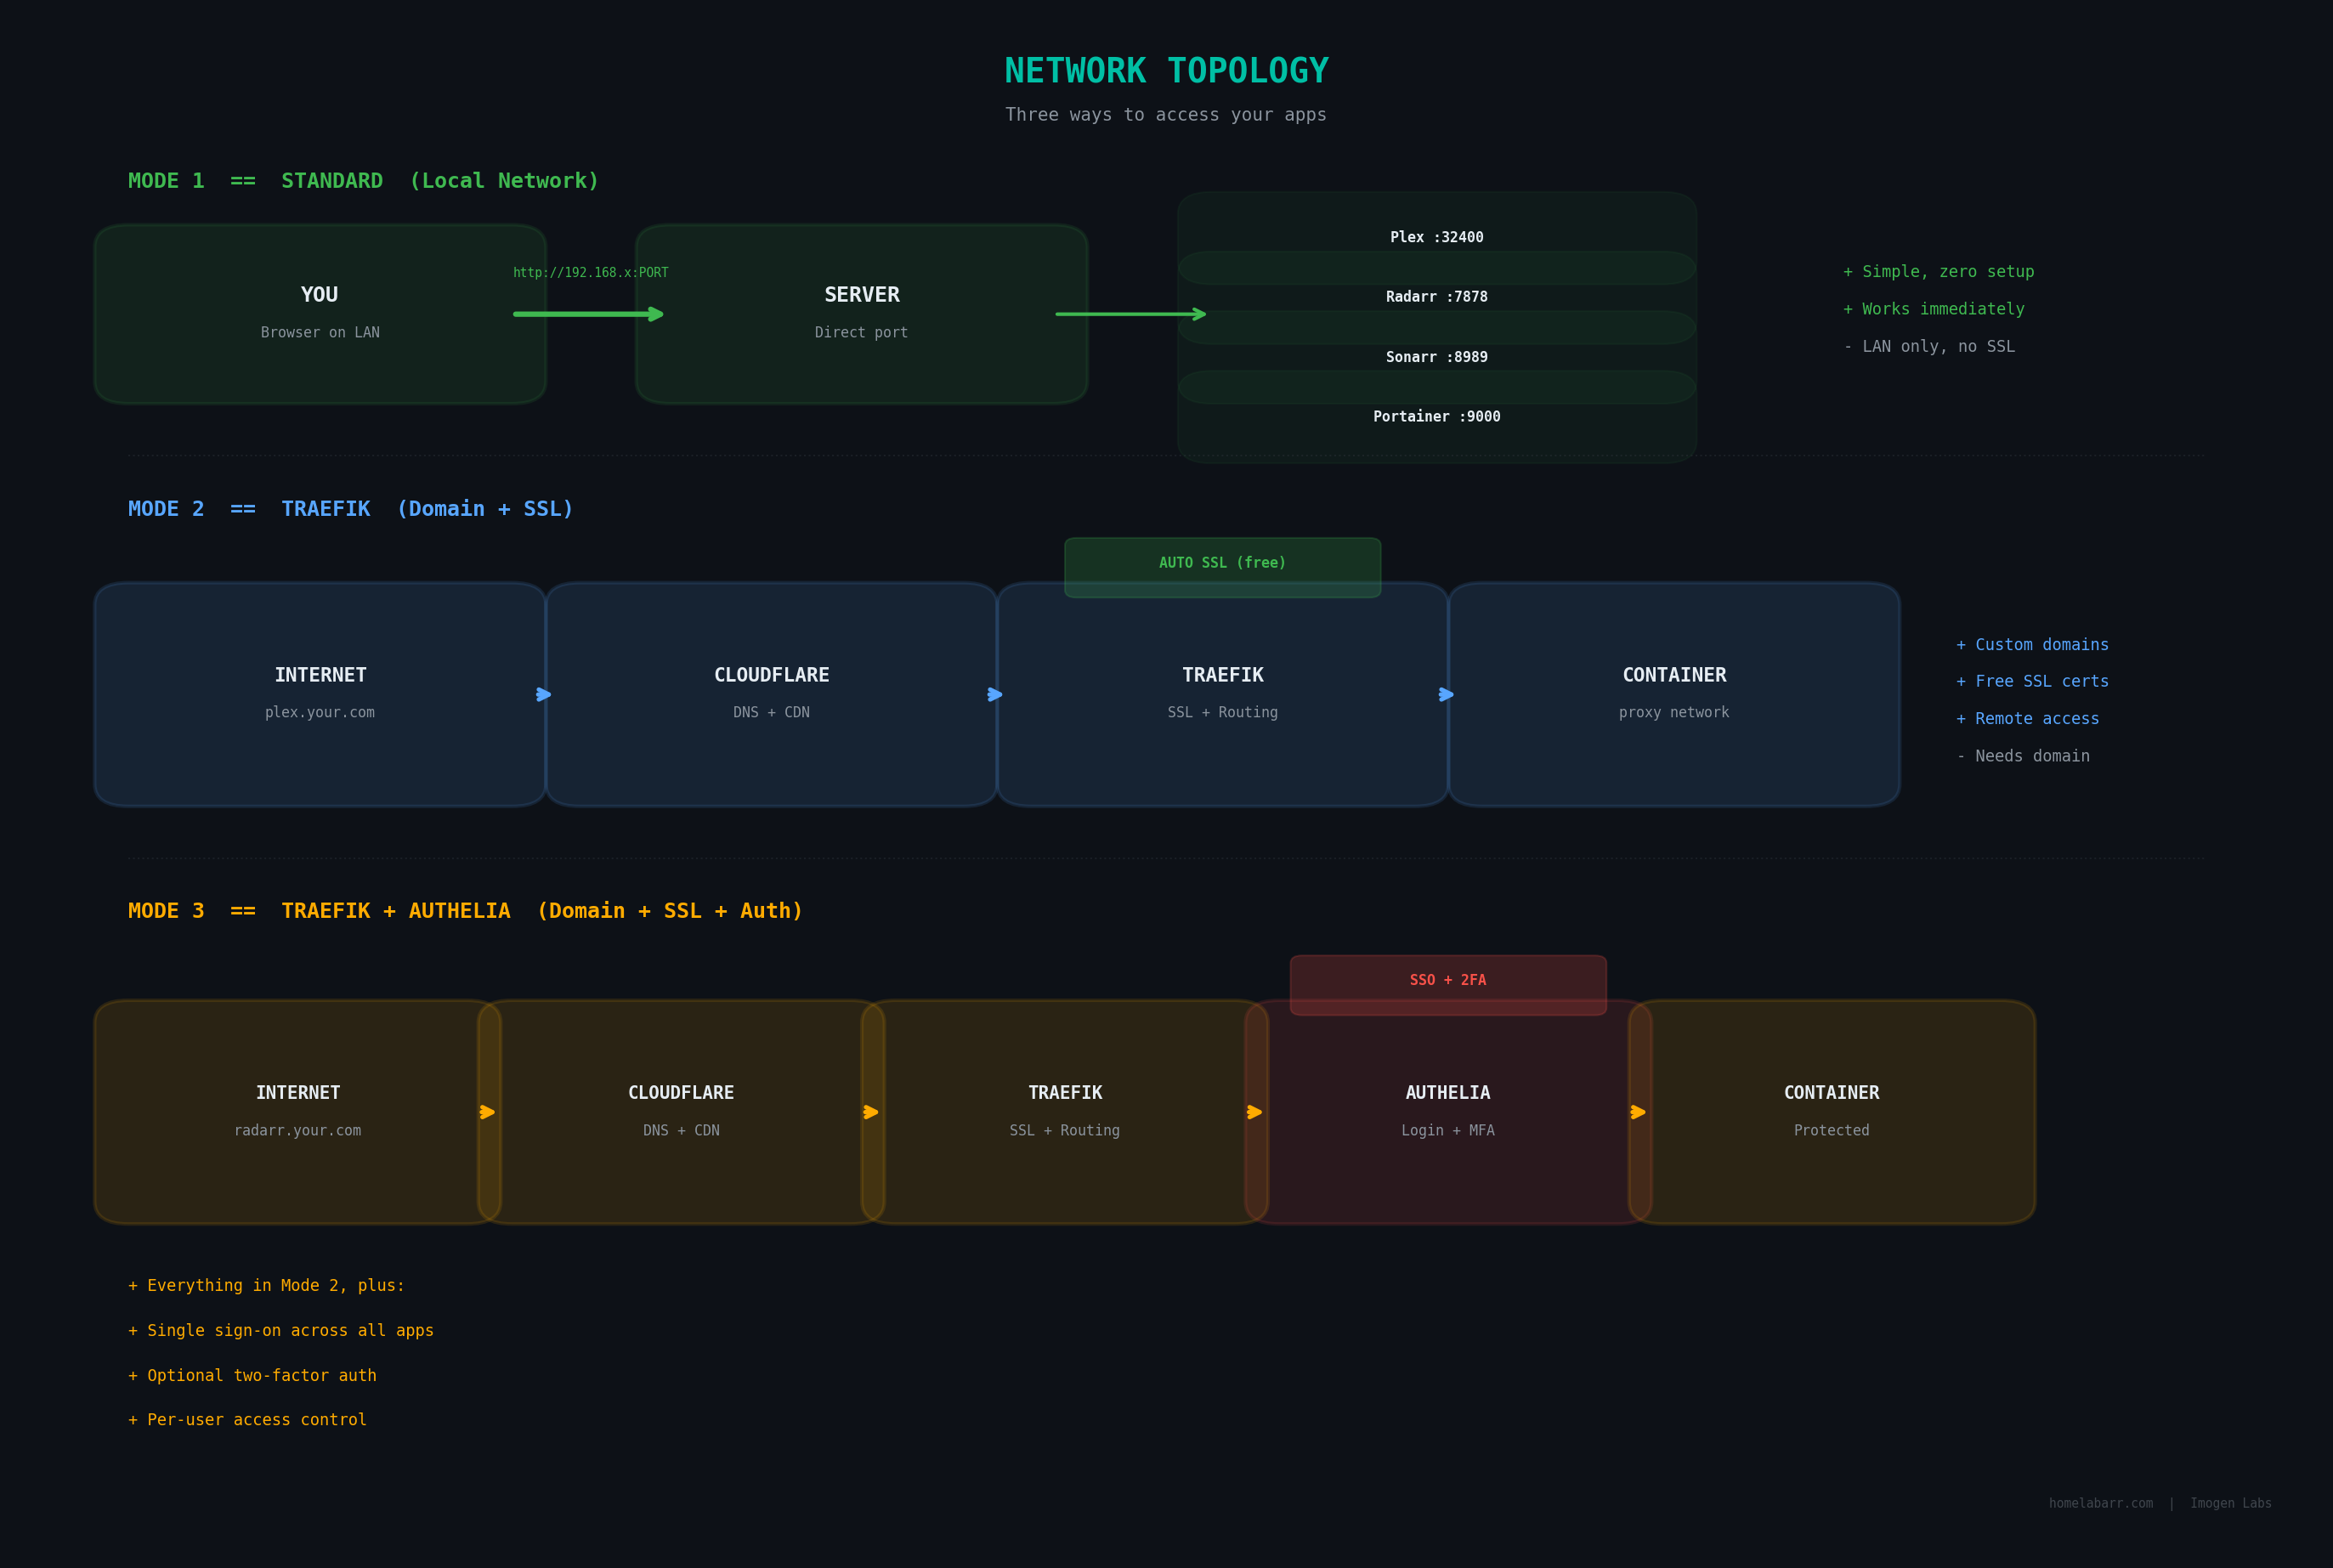
Standard: App binds to a port. You access it at http://server:PORT. No setup required, works immediately.
Traefik: App joins the proxy network. Traefik reads Docker labels and routes by hostname with automatic SSL. You get URLs like https://jellyfin.yourdomain.com.
Traefik + Authelia: Same as Traefik, but Authelia sits between Traefik and your app — requiring login with optional two-factor authentication before anyone can reach the container.
Where Data Lives
/opt/appdata/           # Your apps' data (configs, databases, media indexes)
├── plex/
├── radarr/
├── sonarr/
└── ...

homelabarr-data/        # Docker volume — HomelabARR settings (users, sessions)
Back up /opt/appdata/ and you've covered everything important.
Tech Stack
| Component | Technology |
|---|---|
| Frontend | React 19, shadcn/ui, Vite |
| Backend | Node.js, Express |
| Container management | Docker SDK (via socket) |
| Authentication | JWT tokens + hlr_ API keys |
| Deployment streaming | Server-Sent Events (SSE) |
| Container images | LinuxServer.io + official images |
| CI/CD | GitHub Actions → GitHub Container Registry |
CI/CD Pipeline
feature/* → dev branch → staging branch (1-week soak) → main branch
When code merges to main, GitHub Actions: 1. Builds multi-arch Docker images (amd64 + arm64) 2. Pushes to GitHub Container Registry (ghcr.io/imogenlabs/) 3. Deploys the wiki to GitHub Pages
If you run HomelabARR with Watchtower, it auto-pulls new images when they're published.
Contributing
Want to add an app template, fix a bug, or improve the docs? See Contributing for the workflow. The short version: fork the repo, create a feature/* branch, deploy to dev to test, then open a PR against staging.