Web Dashboard
This is your home base. Everything you need to deploy and manage apps lives here.
How to get there: Open http://YOUR-SERVER-IP:8084 in any browser.
Default login: Username admin, Password admin.
Change your password immediately
The default credentials are well-known. Before deploying any apps, sign in and update your password from the user menu in the top right.
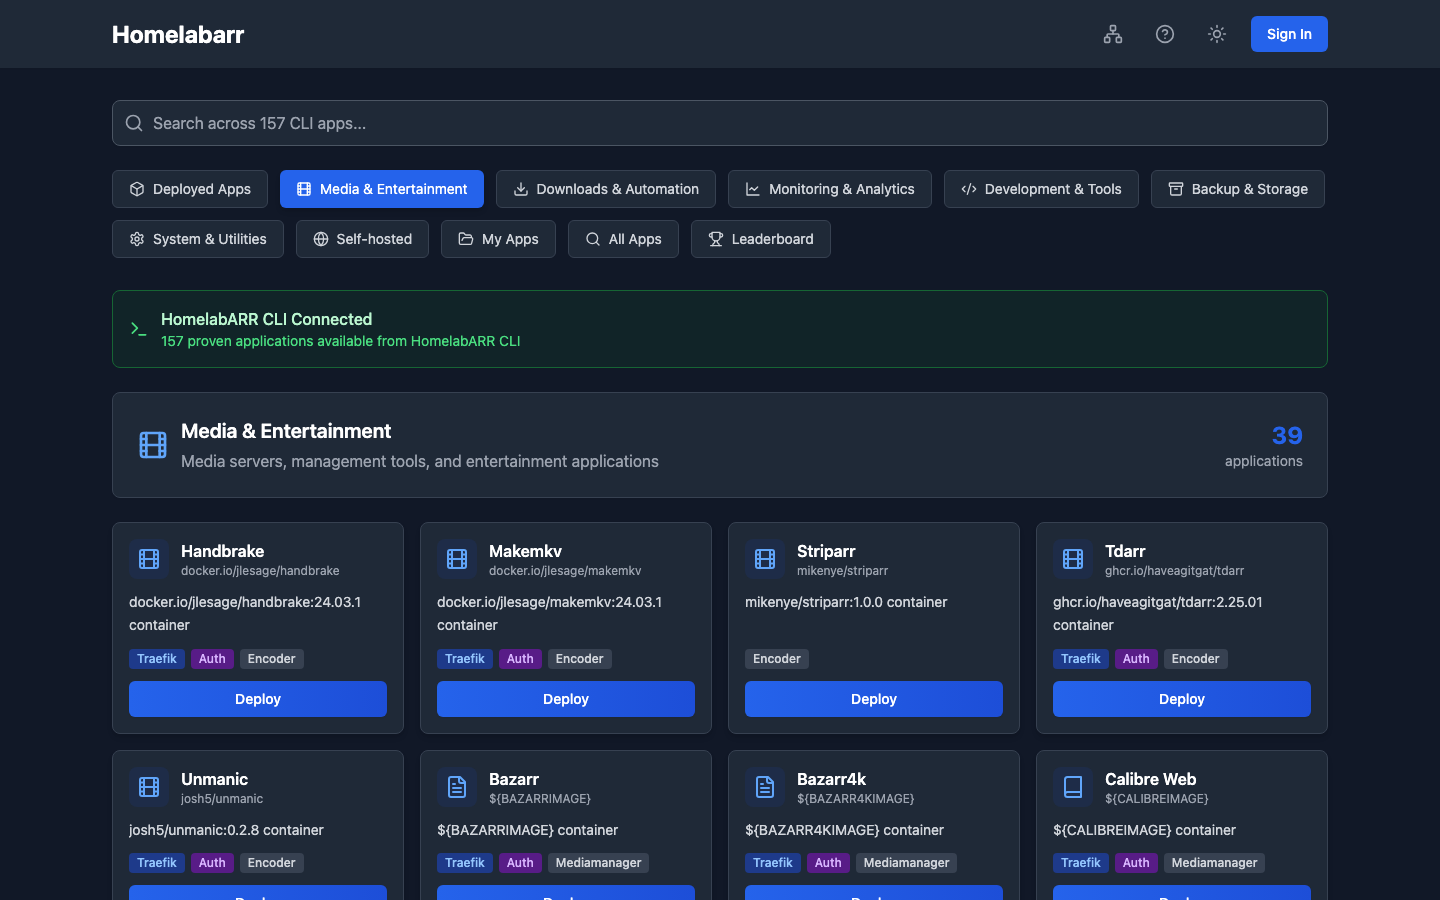
What You're Looking At
The dashboard header has four controls:
- Port Manager — see which ports are taken on your server and find free ones
- Help — quick links to docs and Discord
- Theme toggle — switch between dark and light mode
- Sign In — log in to unlock deploying and managing containers
Below the header: a row of category tabs to filter the catalog, a search bar to find apps by name, and the app cards — one per app, showing the container image, deployment badges, and a Deploy button.
Below each app card: a category tag (e.g., media-servers, ai) and any capability badges — Traefik (supports reverse proxy + SSL) and Auth (supports Authelia authentication). Apps without these badges work in Standard mode only.
Browsing Apps
Apps are sorted into 10 categories. Click any tab to filter:
| Tab | What's in it |
|---|---|
| Media & Entertainment | Plex, Jellyfin, Emby — your streaming servers |
| Downloads & Automation | qBittorrent, SABnzbd, NZBGet, Prowlarr, Jackett |
| Monitoring & Analytics | Netdata, Grafana, Speedtest, Uptime Kuma |
| Virtual Desktops | Chrome, Firefox, Discord, Steam — full desktops in your browser via Kasm |
| Backup & Storage | Duplicati, Restic, Rsnapshot |
| System & Utilities | Portainer, Dozzle, Watchtower, Gluetun (VPN) |
| Self-hosted | Nextcloud, Bitwarden, Pi-hole, Home Assistant, n8n |
| AI & Machine Learning | Ollama, Open WebUI, ComfyUI, Stable Diffusion, LocalAI |
| My Apps | Your own custom templates (more on this below) |
| All Apps | Everything in one alphabetical list |
Two special views:
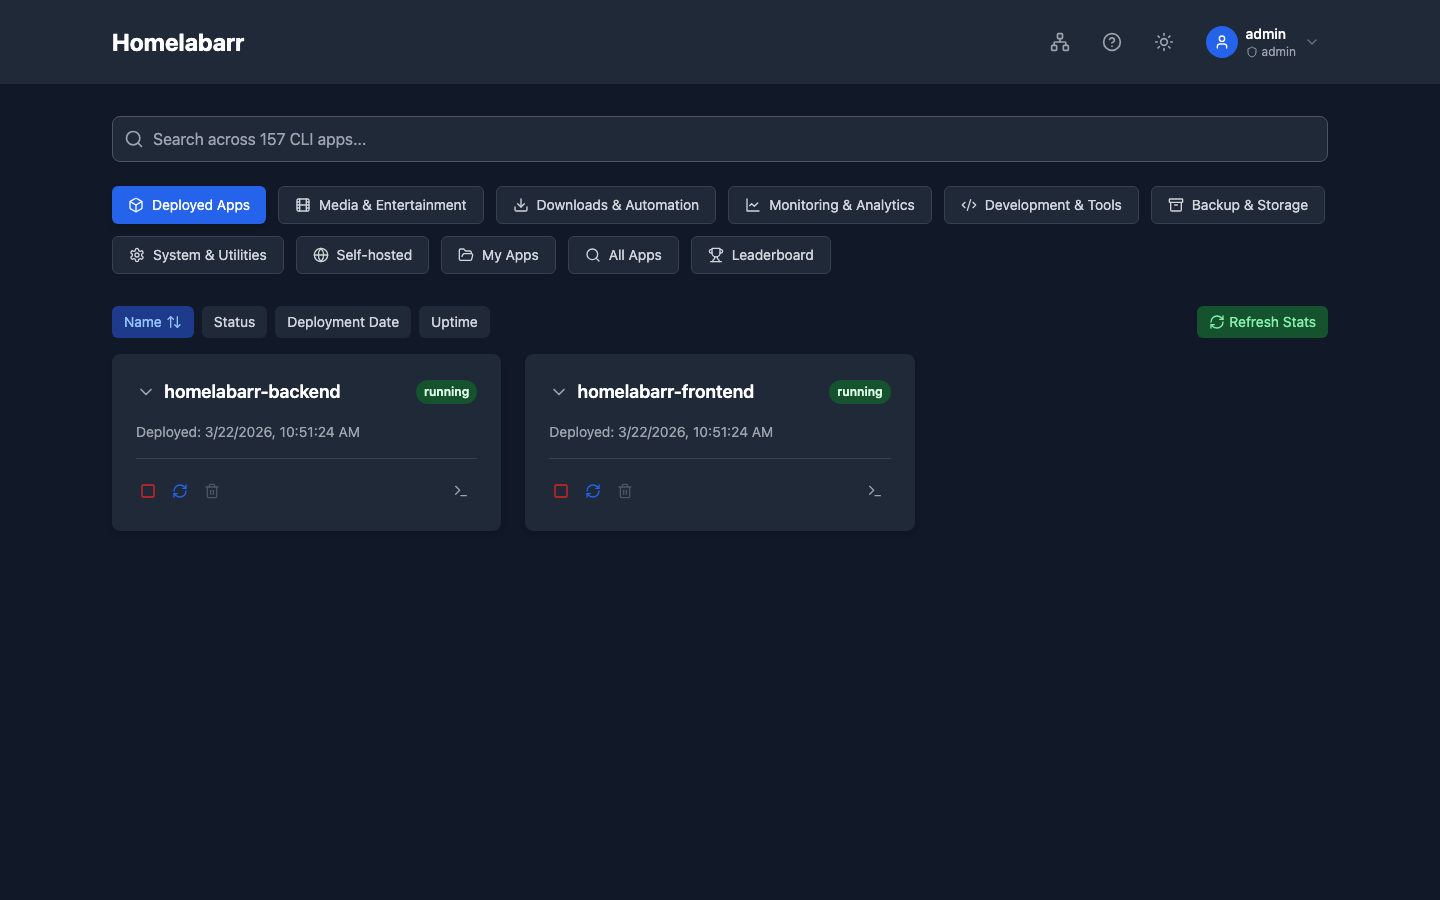
- Deployed Apps — shows only the containers currently running on your server
- All Apps — the full catalog, A to Z
Use the search bar at the top to find apps by name across all categories.
Deploying an App
- Find the app you want — browse by category or search
- Click the blue Deploy button on the app card
- Pick a deployment mode:
- Standard — the simple one. The app gets a port number, you access it at
http://your-server:PORT. No extra setup needed. Start here if you're not sure. - Traefik — gives the app its own URL like
https://plex.yourdomain.comwith free SSL. Requires a domain name and Traefik running on your server. (Traefik setup guide) - Traefik + Authelia — same as Traefik but adds a login page in front of the app for extra protection. Good for anything you expose to the internet.
- Standard — the simple one. The app gets a port number, you access it at
- Adjust any settings — timezone, data paths, etc. The defaults usually work fine
- Click Deploy — watch it install in real time
What happens when you click Deploy
You'll see a real-time progress feed showing Docker downloading the image and starting the container — not a spinner that leaves you guessing. If something goes wrong, you see the actual error message here.
Managing Running Apps
Click Deployed Apps to see everything currently running. For each container:
| Action | What it does |
|---|---|
| Start | Start a stopped container |
| Stop | Graceful shutdown |
| Restart | Stop and start again — use this after config changes |
| Remove | Delete the container (your data in /opt/appdata/ stays safe) |
| Logs | View the container's console output — useful for troubleshooting |
Port Manager
Click Port Manager in the header to see every port in use by Docker containers on your server. Shows the port, which container is using it, and helps you avoid conflicts when deploying new apps.
Signing In
Click Sign In in the top right.
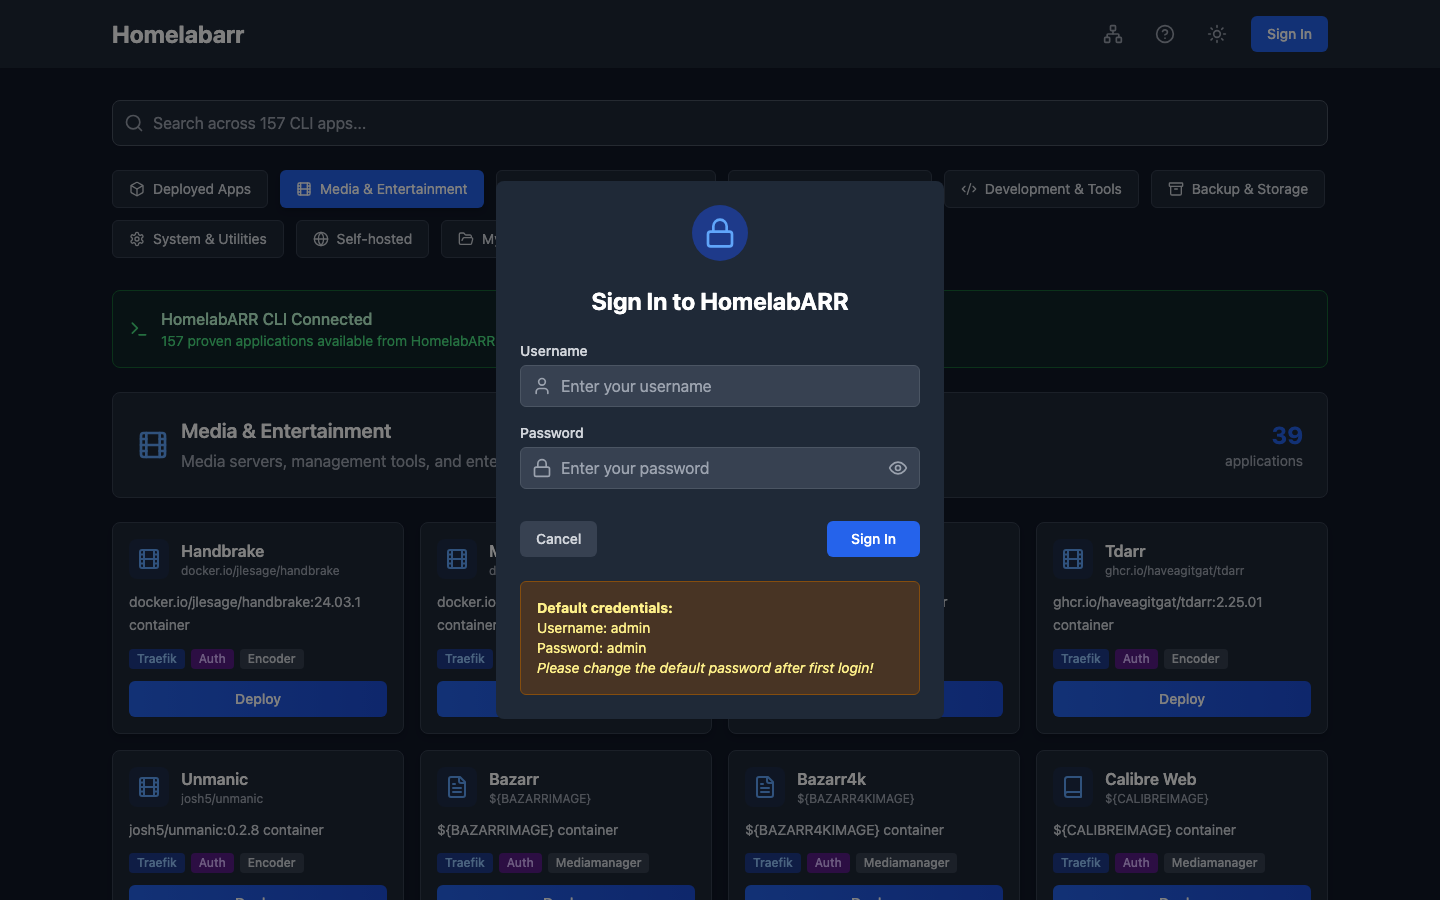
Default credentials: admin / admin
Change this before anything else
Click your username in the top right after signing in and set a real password. Anyone on your local network can log in with admin/admin until you do.
API Keys
For scripts, automation, or the mobile app — JWT tokens expire after a short time. API keys don't.
- Sign in to the dashboard
- Click your username → API Keys
- Click Generate New Key
- Copy the
hlr_key — it's only shown once
Treat API keys like passwords
An API key gives full access to your HomelabARR instance — anything you can do in the dashboard, the key can do via the API. Keep it out of public repositories and revoke unused keys promptly.
Use it in API calls:
curl -H "Authorization: Bearer hlr_your_key_here" http://your-server:8092/applications
When to use JWT vs API key:
- JWT token (from
/auth/login) — expires, good for short-lived scripts or testing - API key (
hlr_) — permanent until revoked, better for long-running scripts, the mobile app, and any automation that runs regularly
Adding Your Own Apps
Got a Docker app that's not in the catalog? Drop it in apps/myapps/:
# apps/myapps/my-app.yml
version: "3"
services:
  my-app:
    image: my-image:latest
    container_name: my-app
    restart: unless-stopped
    ports:
      - 9000:9000
    environment:
      - TZ=${TZ}
    volumes:
      - ${APPFOLDER}/my-app:/config
Refresh the dashboard — your app shows up in the My Apps tab. You can use the same variables (${TZ}, ${APPFOLDER}, etc.) that built-in apps use. See the CLI Bridge guide for the full variable list.
Dark Mode
Click the sun/moon icon in the header to switch between dark and light mode, or it follows your system preference automatically.